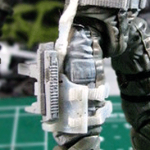
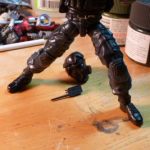
Forum member Giga Bread shows us how to assemble his custom 3D-printed holster. Read More »
Tutorials
Rigid Soft Goods
Check out this comprehensive tutorial by The Willoughbian, who takes us through the steps in making rigid capes, cloaks, and hoods! Read More »
Explosion Effects
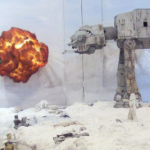
Board member Zipidi Doodah shows us how to make cool explosion effects -- WITHOUT photo editing software! Read More »
Digital Camo “Skin” Transfer Tutorial by Giga Bread
Forum member Giga Bread brings us another excellent tutorial today, this one is for that digital skin transfer that shows us all that while it’s a bit technical, it’s not all that difficult. The steps are simple and comprehensive, and even the novice customizer should be able to do this with little trouble if you follow the steps provided! “Disclaimer: This method is still a work in progress. The method I chose for this tutorial may change at a later date as I continue to experiment. The finished figure is an example that used the method about to be shown. Materials: Container of clean water Tape (any kind but electrical will do) Hobby knife with a really sharp blade Soft bristled brush Tweezers Matte Medium Laser print with your texture ... Read More »
Adding Blood to Your Photos
BOOM! Headshot! Or in the case of the following images, chest shot. Either way, we get another Photoshop tutorial and a dead Viper, courtesy of forum Officer Fled74! I find this is a very useful tutorial, and something I know a lot of people struggle with. Fled74 makes it seem easy! And I think if you follow the carefully laid out steps, you’ll start finding it a lot easier, too! “First off, let me apologise for the long delay in creating this tutorial. I blame Max Payne 3 and Grand Theft Auto 4 for being too damn addictive. Anyway, here goes. Blood has always been a distasteful subject, but during the course of diorama photography and the pursuit of greater realism, we may eventually encounter dio situations where bloodshed is necessary. Applying actual “blood” (Halloween blood or similar) to ... Read More »
Custom Figure Painting Tutorial by MIKED
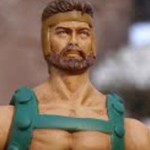
We have a multitude of tutorials on the front page and the forums themselves, ranging from painting camo to wiring LEDs, but I think what we have here is quite possibly the most comprehensive and wide ranging painting tutorial to date, and it comes from forum member MIKED. I’m not going to say this is the end all, be all of painting tutorials, but in my opinion you certainly can’t go wrong following the techniques he uses, and explains in great detail so that even the most amateur of us should be able to follow his example. “Hey All! Welcome to my custom figure painting tutorial. Thank you for your interest. The subject of this tutorial is my new Marvel Universe Hercules custom. I decided to do the Lion of Olympus in his garb from his mid to ... Read More »
Rocker Ankle Tutorial
Courtesy of forum member Obi-Shinobi. Ok guys, here we go! I’ll be demonstrating with the coveted ST , but this can be applied to any figure. Start by removing the stock feet – Using a blade, carefully cut the joint from the foot – Now use your dremel to define the new slot, and drill the corresponding holes in the foot, for the ankle pegs. – Which should leave you with something like this – Now, locate a pair of articulated hands for the new ankles. I’m using 2 Ren Duke left hands because they’re a darker color and most importantly, the POA run in the same ... Read More »
Adding Muzzle Flashes & More
Courtesy of forum Officer Fled74! Before I begin, I have to say that this tute works best with good, clear photos. Photoshop will not make a poorly-taken, blurry photo magically better. I must also say that I am by no means a Photoshop guru. More skilled people will have their own way of doing things, but this way works fine for me. Anyway, it’s been quite a while since I promised to make this tutorial for you guys. Apologies to all the guys who PMed me about it. Although it seems long and complicated, believe me, making the tute and taking screenshots were far more time-consuming than just adding the effects. I’m using Photoshop 7 for this, but I’m pretty sure the techniques will work for other versions. You can probably find a torrent or something, although I’m not ... Read More »
Metal Gear MSF Styled Stabo Gear
Tutorial comes courtesy of forum member Giga Bread. What you’ll need. 1. MSF Stabo set from Shapeways 2. x-acto blade 3. pen 4. cork backed ruler 5. tweezers 6. super glue (preferably a fresher bottle, unlike mine) 7. medical tape, micro canvas, or heavy paper 8. dummy figure- Since this method involves a little direct glue to the figure until the harness is constructed, I use a dummy figure with the same measurements, so I don’t destroy the paint job of of the figure I’m making this harness for. 9. wire snips Tips… 1. Don’t sneeze, exhale in frustration, or work next to an open window on a breezy day. Once your printed items are separated from the sprue, they can easily be lost forever. 2. When clipping sprues of printed items, always use wire snips. Bending it until ... Read More »
SDCC 2012 Shockwave HISS
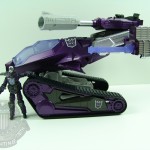
Ah, Hasbro. Another year has gone by and you come up with another decent crossover exclusive. Although the tank was not the highlight of the set there was plenty to make this worth it if you got your hands on one. The HISS is a painted up Retaliation tank that has static treads. Those and a glass canopy are two things I’m not a fan of. The design of the new HISS tanks are ok but of course Cobra overlook certain engineering features. Open turret? Is this 1984 still? Let’s protect that gunner already! The attack mode is fairly worthless too. It points at the ground. Great of you want to dig a hole I guess. The did manage to use a barrel similar to the original Shockwave though. It is a little smaller but has the same design minus ... Read More »
 The Fighting 1:18th! The best Military 1:18 scale site on the net!
