Arkham City Diorma "WIP" thread

CustomCreator

Enlisted
Sep 4, 2012
32
0
0
I started this huge diorama about 4 years ago (yea). After playing Arkham City, I got the inspiration to create a block of the City in diorama form.

Onto the pics

Little update here. Still imagining where I want to go with this.


It's amazing what time it takes just staring at a piece of foam to get ideas.

I spent about 1.5 hours tonight just doing two little things, but it's a LOT of trial and error, and for some reason, I can't cut for crap. 3 1/4?? No sweat, mark the wood, cut, and CRAP! It's too small. Try again, IT'S TOO BIG!! lol

Anyway, boarded up the door, got a little more weathering done to it:


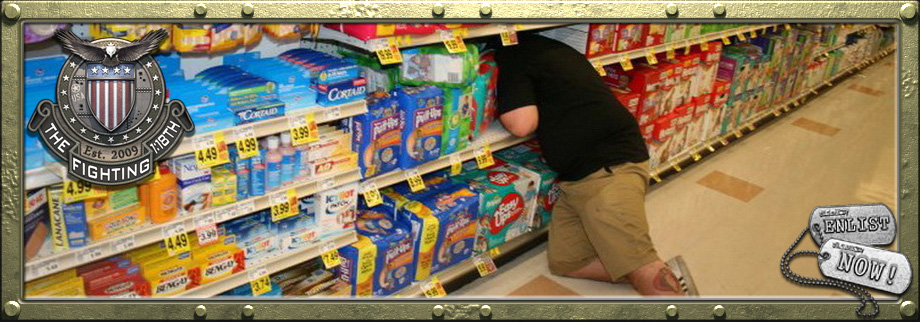
Then I am attempting to reproduce a window as seen in the picture (this was taken at work actually)


This is a PIA. I finally cut a piece of styrene, and glued the sticks to that. Then I will mount the whole thing recessed in between the top and bottom "ledges"


Leary to start the window part....
 

CustomCreator

Enlisted
Sep 4, 2012
32
0
0


Little more window progress. Not really sure what I am doing with this as I am having a hell of a time trying to accomplish what I want


Test fitting the sidewalk and door. Yes, the door is supposed to be raised a bit.


Bit of mood lighting


Little bit of weathering here. I took down the awning above the door as I wasn't feeling it. Probably just put a light or something.

Now, I am no graffiti artist, so don't laugh too much...lol. There will be posters on the wall and a sign above the garage door.


CustomCreator

Enlisted
Sep 4, 2012
32
0
0
Put a frame around the garage door and started placing where the brick will show through "stucco". Also decided to board up the "window" with some imitation plywood...lol. In the middle, a rusty pipe will be sticking out.


Now for a little tutorial. I have used this stuff before with great results, but I recently learned a new trick with it to keep the rust going. Basically this is a kit you can get at any craft store.


First I took a Dremel to the end of some plastruct plastic. Then you "paint" on actual bits of ground up iron in a solution onto whatever you want to rust.


You wait for it to dry, and then apply the rusting solution with a brush. Well instead, a guy on a model car forum decided to try this:

You put the solution in a spray bottle


Place the object in a ziploc


Spray the solution in


And hang it up to do it's thing


I will leave this for a couple days to get a maximum effect


"rusting" of the plastic pipe:


Still a bit to go on this section. I want to put some lights over the doors and do some more trim work and weathering.
 

CustomCreator

Enlisted
Sep 4, 2012
32
0
0
Shining light onto Gotham with this update.

Got the garage signage done ;)


I try and live by the motto: "The devil's in the details"

Closed sign


Rusty nails


Now, let's light up the night!


The bulb is orange.

OH!


Woody stopped by (a little too quickly.....lol)


Kinda struggling with the "theater" building.

This will be the side of a ballroom or theater. I miscalculated the size of the building when I printed the billboard, so we'll see how it works.

I also ran out of supplies to cover the upper walls so not sure what I am going to do there. I kind of like the granite look, but no building is just granite without some kind of grid lines in it....

Anyway:


CustomCreator

Enlisted
Sep 4, 2012
32
0
0
Started on the far wall. I got rid of the columns. Also got the "mini billboard" started. This basically supposed to be a jumbo sign versus a full fledged billboard.


Little tutorial:

Basically made with Styrene

Make a square frame


Add some mesh and another piece to hold down the mesh. The two vertical pieces hold the sign


Gotta be painted and rusted of course


It never seems like a lot of work, but this thing took me like two hours (including the wall)

Small update here. Painted the doors on the "theater" building. Started the stucco, but ran out of my secret weapon....lol.


Check out the blog for more in depth tips and tricks! http://s4.zetaboards.com/CustomCreator/blog/main/3323894/
 

CustomCreator

Enlisted
Sep 4, 2012
32
0
0
Alright folks, I need you to put your imagination caps on.

This building will support a pizza place on the first floor. The top half will be an industrial building. Next door will be a small courtyard with another big building finishing off the block.


Hey, even Bats gets hungry for a slice (there will be a door here)


In place


Donatello keeping watch


Uh oh, looks like Bats has an admirer


\

Of course, this is very rough, but fear not!
 

Obi-Shinobi

Pioneer, Damn It!
Apr 6, 2011
2,370
16
38
54
York, PA
Very slick. I can only imagine how much fun it would be to play on that set-up.

I'm assuming those are doll-house doors and windows? Another nice benefit to working in a larger scale. Man... I wish we had 1:18th resources like that.
 

CustomCreator

Enlisted
Sep 4, 2012
32
0
0
which is the biggest reason I do 1:12 scale. I'm not that great a scratch builder especially when it comes to windows and doors. I am working on that though because dollhouse stuff is REALLY expensive.